 I figured I'd make a tutorial and so I took photos along the way so it might help others.
One thing I'll mention that this takes a while to dry so make sure you don't wait till the night before to decide to start the project.
What you'll need:
- Two packs of pencils or a box or two of crayons
- Glue (elmers, hot or tacky)
- Cardstock
- Picture frame 1 inch thick or shadow boxes. (I used 1" thick frames from Hobby Lobby for $10) Here is a link for them on amazon. I was sort of doing mine last minute and didn't have time to purchase on amazon.
- Scissors (to cut your paper to the size of your frame)
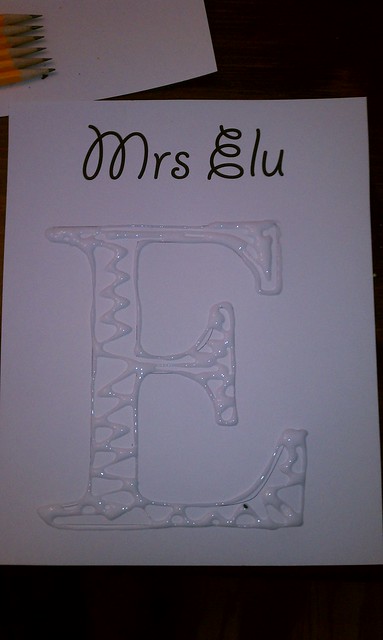
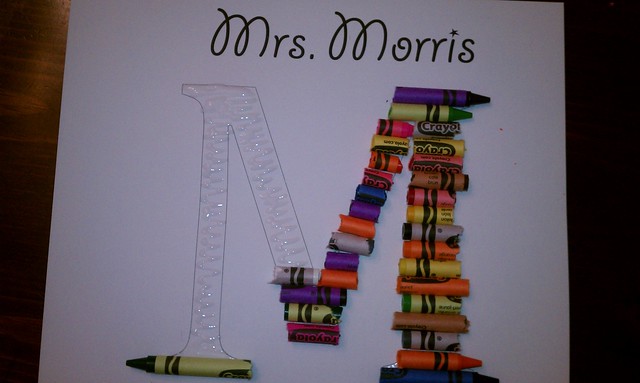
First, open word and use the letter that you need. You can do first or last it doesn't matter. I used 600 or 650 pt and you do this by highlighting the font size and typing it in and then you have to click "enter" for it to work.
Highlight your letter then go to FORMAT --> FONT ---> and click OUTLINE. This will make an outline of your letter.

Find another font you like and type the name. It doesn't matter what font you use, whatever you like. Mess around with it until you get it the way you like. As you can see, I did one in portrait mode and one in landscape mode. Play around with your margin sizes as well.
Print it on cardstock. Because of the size of the letter, I had to run the page through for the letter and then again for the name. I printed one on a regular sheet of paper and one on nice cardstock. I used the regular paper as my working project and the cardstock as the final one. Between the crayons and the pencils, you don't want to put marks on the nice cardstock.
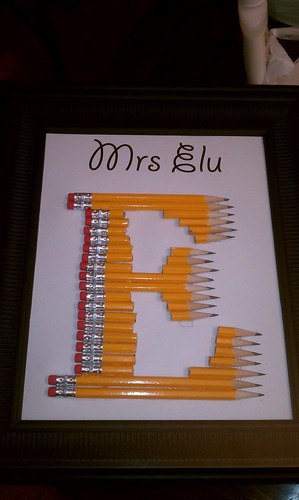
For the pencils I used outside branch clippers. You could use a handsaw or whatever you have handy. I didn't use any sandpaper but if you are a perfectionist, you might want to have some on hand to file down some edges. It is easier to sharpen then cut. You can use a sharpie to mark a dot where you need to clip the pencil and then just glue the pencil with the dot side down so you don't see it.
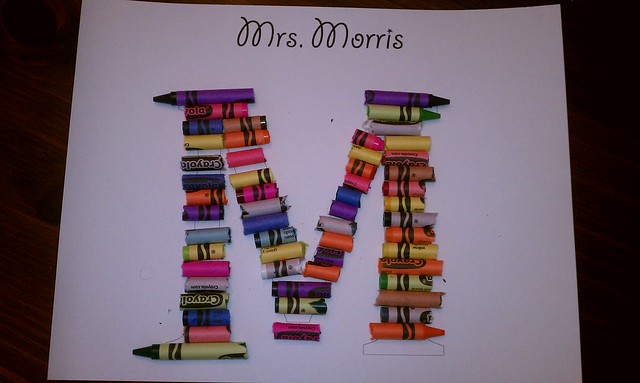
For the crayons, I found that if I poked a slight hole in the crayon with a sharp knife, the crayon broke exactly where I needed it to.
Make sure you cut them long/wide enough that they cover the outline of the letter that you've printed.

Lay them out on your working paper because you WILL move them around. :)
 Once you get everything the way you want them, it is time for glue. I used good ole Elmers School Glue. You could use hot glue or tacky glue. Tacky glue would have probably been a better bet but mine turned out fine with Elmer's.
Then I laid out my pencils / crayons. With the elmers I could still move them around a bit and since it dries clear, I didn't have to worry so much about staining.
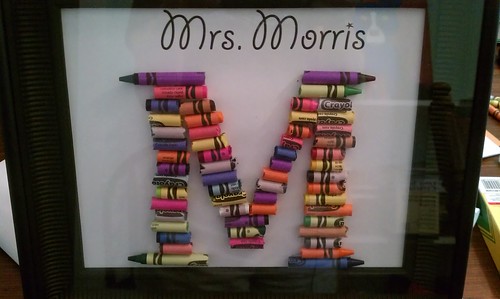
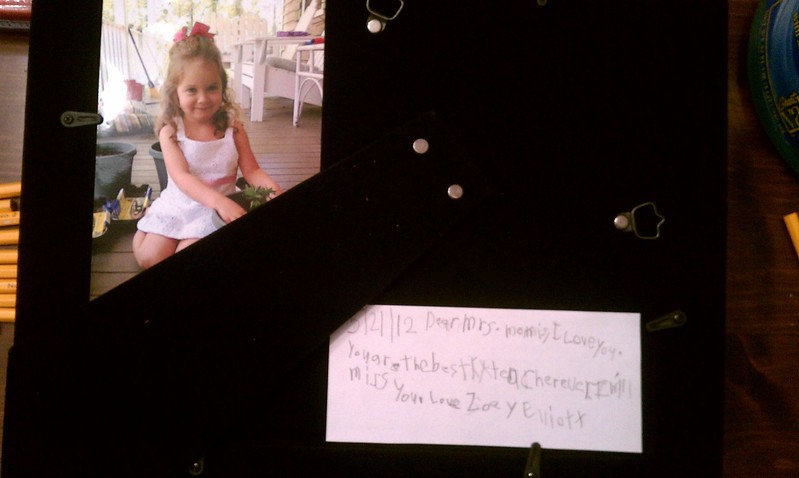
I placed a heavy text book on top of it while it dried. Then I put it in the frame (or shadow box if that is what you use) and printed a photo of my daugter(s) and had them write a little note which I glued to the back. Just so the teacher would remember them.
That's it. Hope this helps you guys!